🤳 Effortless Sharing: From external apps to your Flutter app in no time
Streamline media sharing to your Flutter app with share_handler package.

Sharing things like files, pictures, videos, and texts from external apps can be difficult, especially when done without any external packages.
Facilitating content sharing via external apps boosts user engagement, improves the user experience, and helps to spread the word about our app.
In this article, we'll be taking advantage of the awesome share_handler package to make sharing from external apps to our Flutter app really easy!
We will be using a multi-flavored flutter app as our starting point for this tutorial. You can find the repo here
🥳 Sounds great, right?
Let's get started by adding share_handler as a dependency in pubspec.yaml
Android setup 🤖
We will start with the easy setup. In our android/app/src/main/AndroidManifest.xml file, we will add the intent filters and metadata for the media types we want to support.
For text-only support
<intent-filter>
    <action android:name="android.intent.action.SEND" />
    <category android:name="android.intent.category.DEFAULT" />
    <data android:mimeType="text/*" />
</intent-filter>
For image-only support
<intent-filter>
    <action android:name="android.intent.action.SEND" />
    <category android:name="android.intent.category.DEFAULT" />
    <data android:mimeType="image/*" />
</intent-filter>
For video-only support
<intent-filter>
    <action android:name="android.intent.action.SEND" />
    <category android:name="android.intent.category.DEFAULT" />
    <data android:mimeType="video/*" />
</intent-filter>
If you want to support any type of files
<intent-filter>
    <action android:name="android.intent.action.SEND" />
    <category android:name="android.intent.category.DEFAULT" />
    <data android:mimeType="**/*" />
</intent-filter>
💡 Tip: You can add
SHARE_MULTIPLEaction, if you want to support more than one media sharing.
<intent-filter>
    <action android:name="android.intent.action.SEND_MULTIPLE" />
    <category android:name="android.intent.category.DEFAULT" />
    <data android:mimeType="image/*" />
</intent-filter>
<intent-filter>
    <action android:name="android.intent.action.SEND_MULTIPLE" />
    <category android:name="android.intent.category.DEFAULT" />
    <data android:mimeType="video/*" />
</intent-filter>
<intent-filter>
    <action android:name="android.intent.action.SEND_MULTIPLE" />
    <category android:name="android.intent.category.DEFAULT" />
    <data android:mimeType="*/*" />
</intent-filter>
💡Tip: You can change the
android:mimeTypeaccordingly for the file types.
Also, if you want to prevent the incoming shares from opening a new activity each time, you can prevent this by changing android:launchMode to singleTask
<activity
...
android:lunchMode="singleTask"
...
>
...
</activity>
For adding our app in share suggestions and shortcuts, we can create a new file share_targets.xml in android/app/src/main/res/xml/share_targets.xml
<?xml version="1.0" encoding="utf-8"?>
<shortcuts xmlns:android="http://schemas.android.com/apk/res/android">
  <share-target
    android:targetClass="@{'np.com.saileshdahal.sharing'+@strings/app_id_suffix+'.dynamic_share_target'}">
    <data android:mimeType="*/*" />
    <category
      android:name="@{'np.com.saileshdahal.sharing'+@strings/app_id_suffix+'.dynamic_share_target'}" />
  </share-target>
</shortcuts>
💡 Tip: Make sure you have
app_id_suffixresource string defined for each flavor.
resValue "string", "app_id_suffix", applicationIdSuffix
If you are not using flavors, you can define this in the following format.
<?xml version="1.0" encoding="utf-8"?>
<shortcuts xmlns:android="http://schemas.android.com/apk/res/android">
    <share-target android:targetClass="{your.package.identifier}.MainActivity">
        <data android:mimeType="*/*" />
        <category android:name="{your.package.identifier}.dynamic_share_target" />
    </share-target>
</shortcuts>
Now, we will add a metadata field in the AndroidManifest.xml file.
<meta-data
    android:name="android.service.chooser.chooser_target_service"
    android:value="androidx.sharetarget.ChooserTargetServiceCompat" />
<meta-data
    android:name="android.app.shortcuts"
    android:resource="@xml/share_targets" />
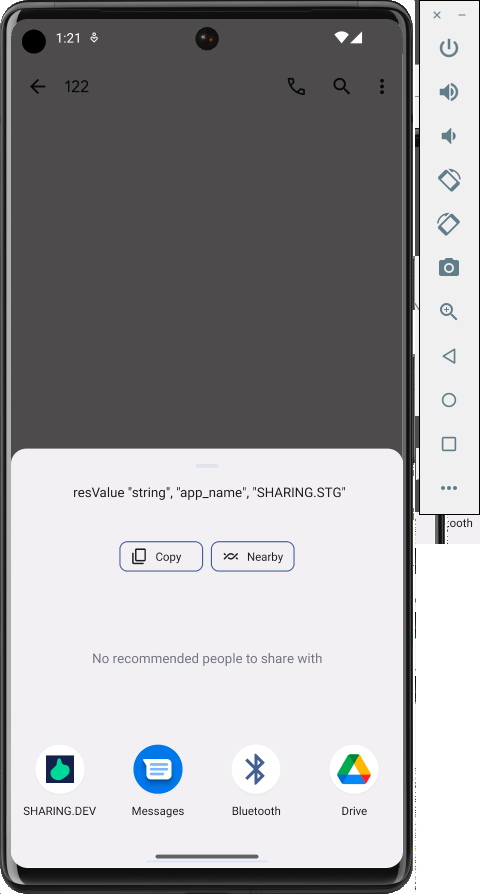
Once done, if you try to share something, you should see the app icon on the share page.
iOS setup 📱
Update Runner Info.plist
For iOS, let's get started by editing our Info.plist file. We will be registering a deep link that will be launched by Share Extension.
For registering the deep link, add the following in your Info.plist
<key>CFBundleURLTypes</key>
<array>
    <dict>
        <key>CFBundleTypeRole</key>
        <string>Editor</string>
        <key>CFBundleURLSchemes</key>
        <array>
            <string>ShareMedia-$(PRODUCT_BUNDLE_IDENTIFIER)</string>
        </array>
    </dict>
</array>
If you already have some entries for CFBundleURLTypes, you can add a new entry like this.
<key>CFBundleURLTypes</key>
<array>
    ...
    <dict>
        <key>CFBundleTypeRole</key>
        <string>Editor</string>
        <key>CFBundleURLSchemes</key>
        <array>
            <string>ShareMedia-$(PRODUCT_BUNDLE_IDENTIFIER)</string>
        </array>
    </dict>
    ...
</array>
💡 Tip: Make sure you have a user-defined variable
PRODUCT_BUNDLE_IDENTIFIERfor your iOS project.
Make sure you have an entry for NSPhotoLibraryUsageDescription if you are planning to share images.
<key>NSPhotoLibraryUsageDescription</key>
<string>Photos can be shared to and used in this app</string>
If you are planning to add AirDrop support, add the following entry in Info.plist.
<key>LSSupportsOpeningDocumentsInPlace</key>
<string>No</string>
<key>CFBundleDocumentTypes</key>
<array>
    <dict>
        <key>CFBundleTypeName</key>
        <string>ShareHandler</string>
        <key>LSHandlerRank</key>
        <string>Alternate</string>
        <key>LSItemContentTypes</key>
        <array>
            <string>public.file-url</string>
            <string>public.image</string>
            <string>public.text</string>
            <string>public.movie</string>
            <string>public.url</string>
            <string>public.data</string>
        </array>
    </dict>
</array>
💡 You can modify
LSItemContentTypesarray based on your need.
Share Extension setup
Now for this part, we will create a share extension from Xcode.
- Open
iosfolder of your flutter project in Xcode.
open ios/Runner.xcworkspace
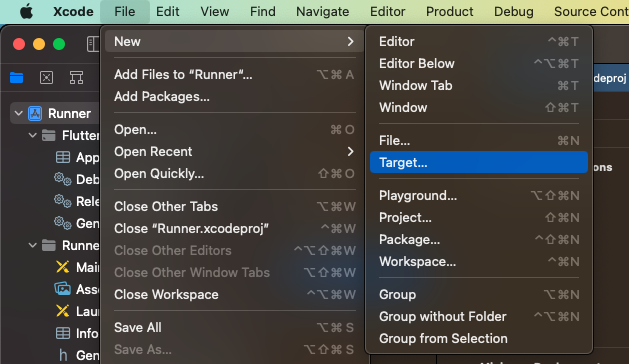
- Go to
File->New->Target
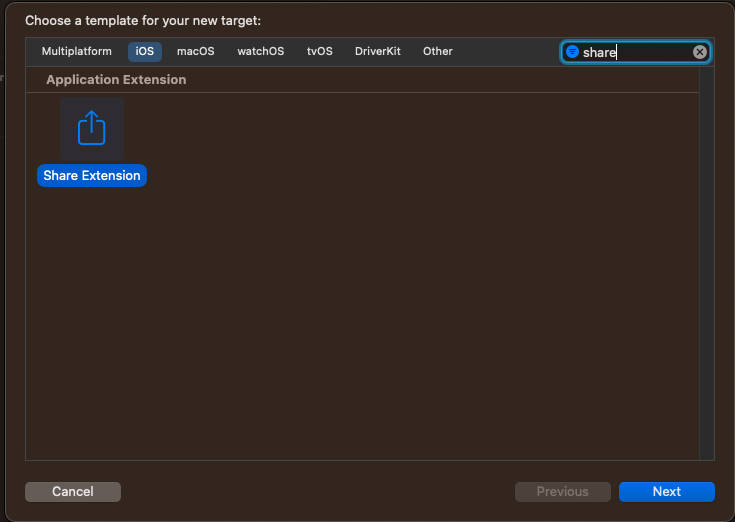
- Search for
Share Extensionand hitNext
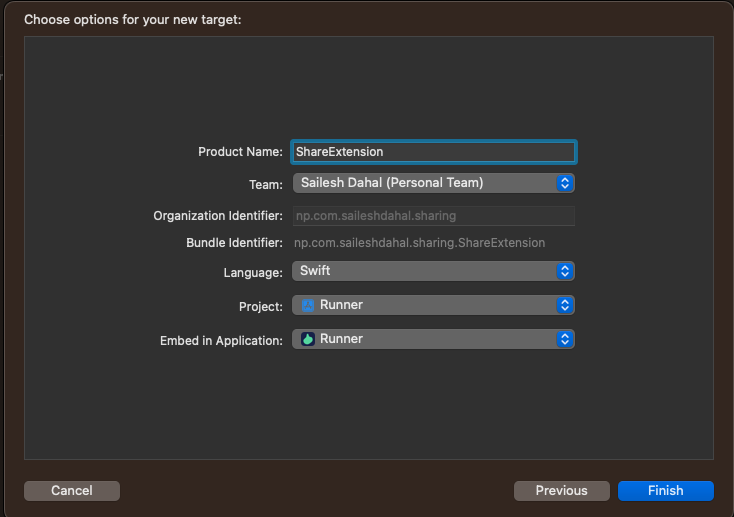
Now create the extension with ShareExtension name, and hit save. This will add a new target for your project.
🚨 Note: Make sure the name is
ShareExtension
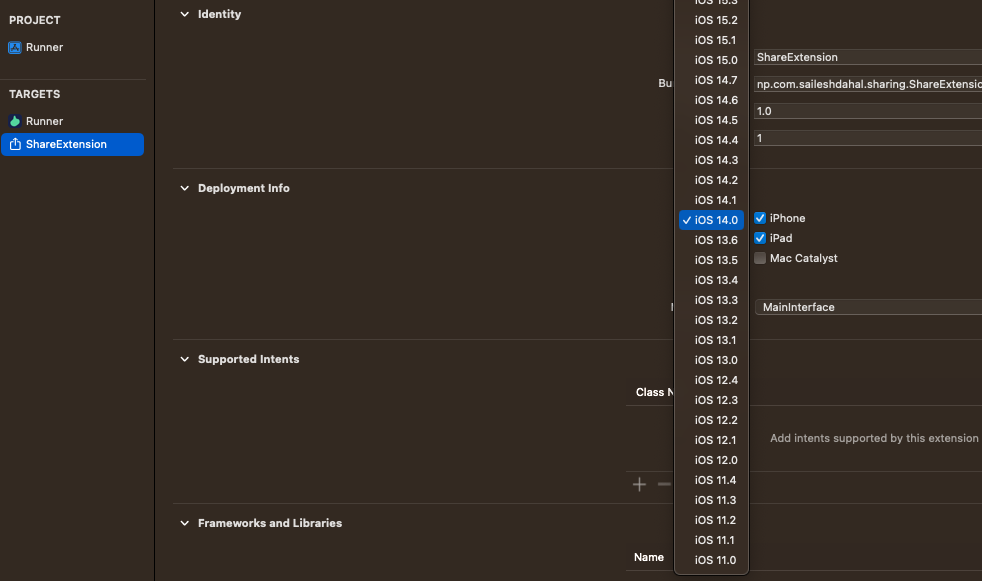
🚨 IMPORTANT: Make sure the minimum deployment version of both targets is the same.
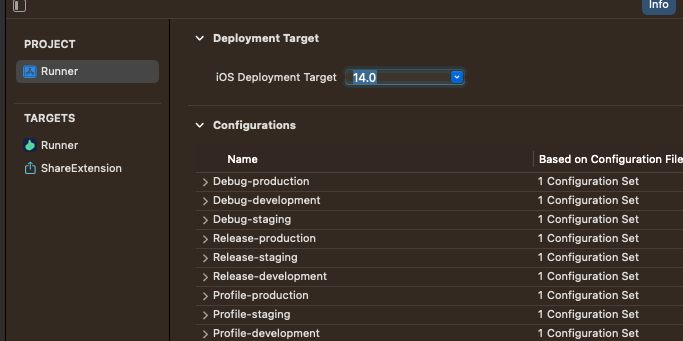
For Target -> Runner, set minimum deployment version to 14.0.
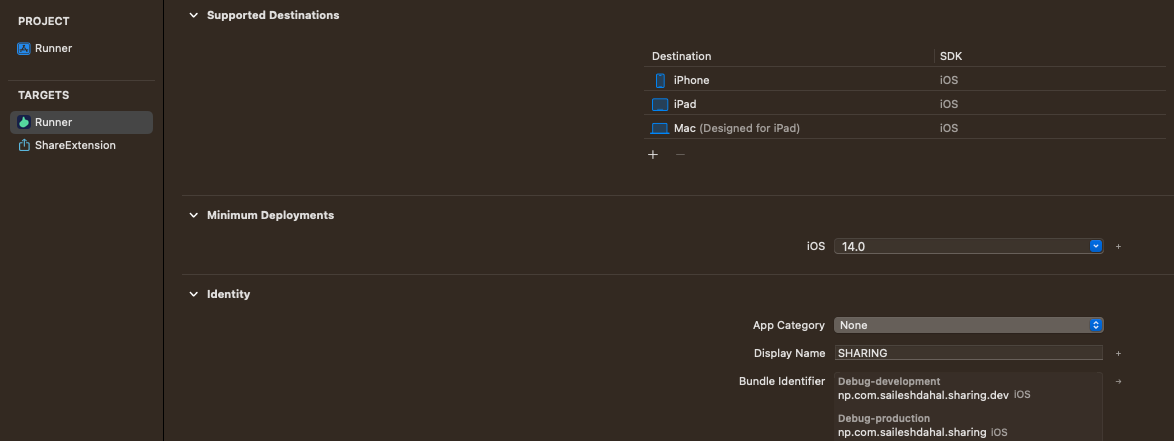
Similarly for Target-> ShareExtension, set minimum deployment version to 14.0
Once this is done, open ios/ShareExtension/ShareViewController.swift and replace everything with following
import share_handler_ios_models

class ShareViewController: ShareHandlerIosViewController {}
🚨 Note: Make sure to run
flutter pub getandpod install --repo-update
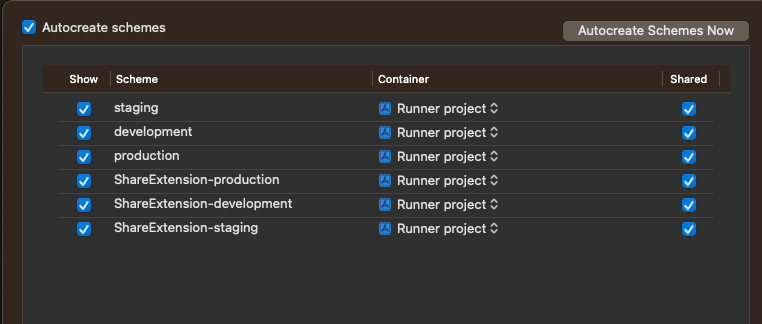
If you have multiple flavors set up then we will also have to create multiple flavors for our share extension. We will create 3 different schemes for share extension too.
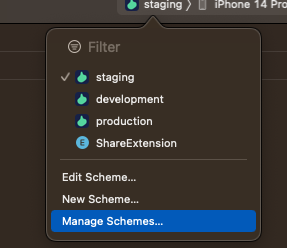
Go to Manage Scheme, and then we will duplicate and create 3 different schemes for ShareExtension as ShareExtension-production, ShareExtension-development and ShareExtension-staging.
Rename ShareExtension to ShareExtension-production that will handle one scheme, and then for staging, we can duplicate ShareExtension-production and rename it to ShareExtension-staging and assign the correct configuration.
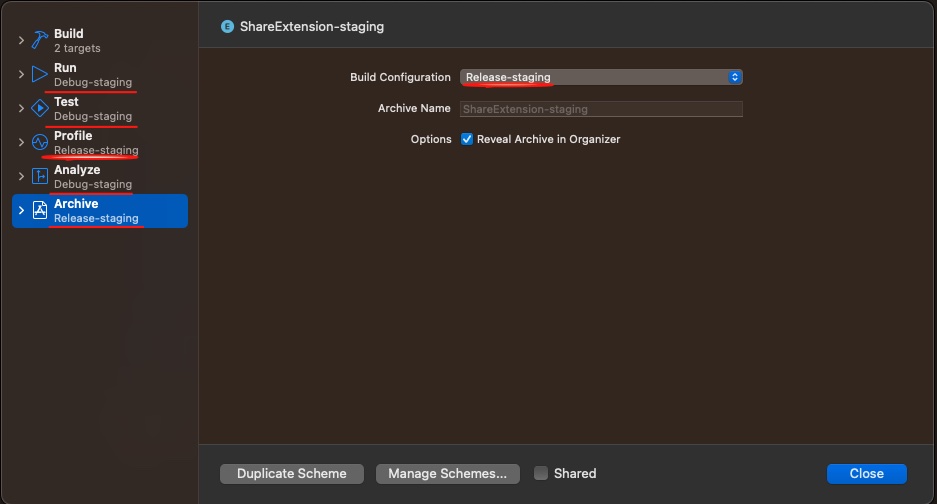
Similarly, we will create one scheme for ShareExtension-development as well.
🚨 Note: You don't have to duplicate the schemes if you are not using flavors.
Share Extension Info.plist update
Once this is done, we will make some changes to ios/ShareExtension/Info.plist
<?xml version="1.0" encoding="UTF-8"?>
<!DOCTYPE plist PUBLIC "-//Apple//DTD PLIST 1.0//EN" "http://www.apple.com/DTDs/PropertyList-1.0.dtd">
<plist version="1.0">
  <dict>
    <key>CFBundleVersion</key>
    <string>$(FLUTTER_BUILD_NUMBER)</string>
    <key>NSExtension</key>
    <dict>
      <key>NSExtensionAttributes</key>
      <dict>
        <key>IntentsSupported</key>
        <array>
          <string>INSendMessageIntent</string>
        </array>
        <key>NSExtensionActivationRule</key>
        <dict>
          <key>NSExtensionActivationSupportsWebURLWithMaxCount</key>
          <integer>999</integer>
          <key>NSExtensionActivationSupportsWebPageWithMaxCount</key>
          <integer>999</integer>
          <key>NSExtensionActivationSupportsMovieWithMaxCount</key>
          <integer>999</integer>
          <key>NSExtensionActivationSupportsImageWithMaxCount</key>
          <integer>999</integer>
          <key>NSExtensionActivationSupportsFileWithMaxCount</key>
          <integer>999</integer>
          <key>NSExtensionActivationSupportsAttachmentsWithMaxCount</key>
          <integer>999</integer>
          <key>NSExtensionActivationSupportsText</key>
          <true />
        </dict>
        <key>PHSupportedMediaTypes</key>
        <array>
          <string>Video</string>
          <string>Image</string>
        </array>
      </dict>
      <key>NSExtensionMainStoryboard</key>
      <string>MainInterface</string>
      <key>NSExtensionPointIdentifier</key>
      <string>com.apple.share-services</string>
    </dict>
  </dict>
</plist>
Here you can make changes to the NSExtensionActivationRule field based on your requirements.
Note: Here we have set the maximum file-sharing count to 999, but you can disable or enable them based on your requirements.
Once this is done, make sure we have different bundle identifiers for each flavor and configuration for Share Extension. If you click Target -> Share Extension -> Singing & Capabilities -> All
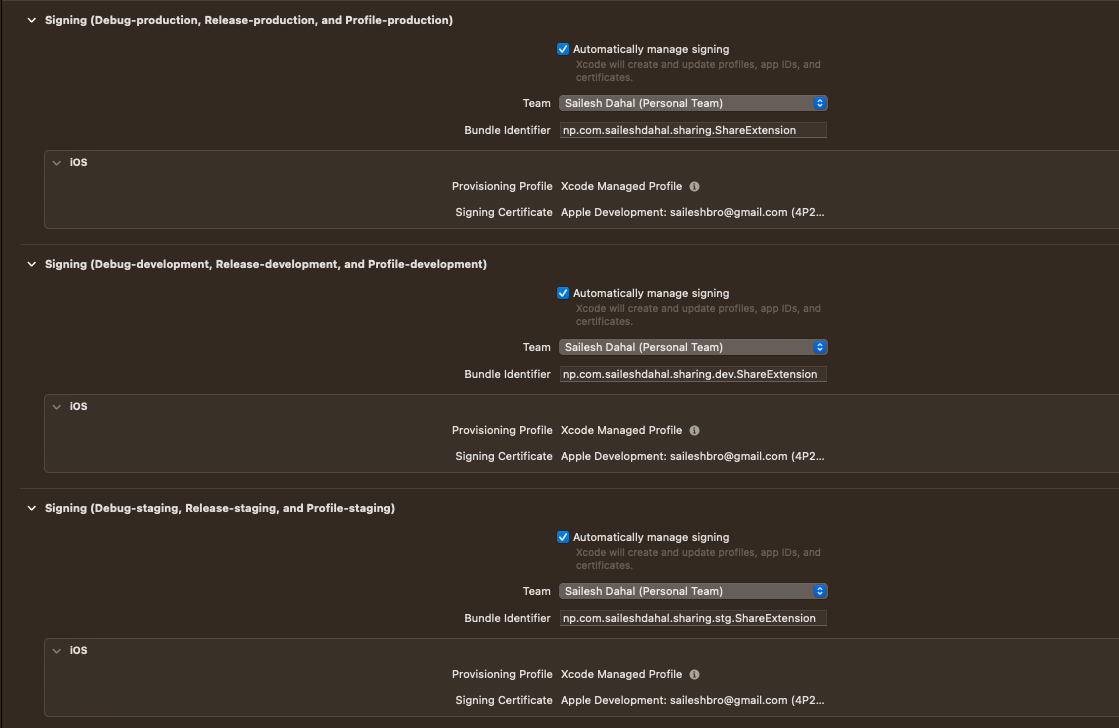
🚨 Note: Make sure the
ShareExtensionbundle identifier for each config has a.ShareExtensionprefix compared to theRunner.
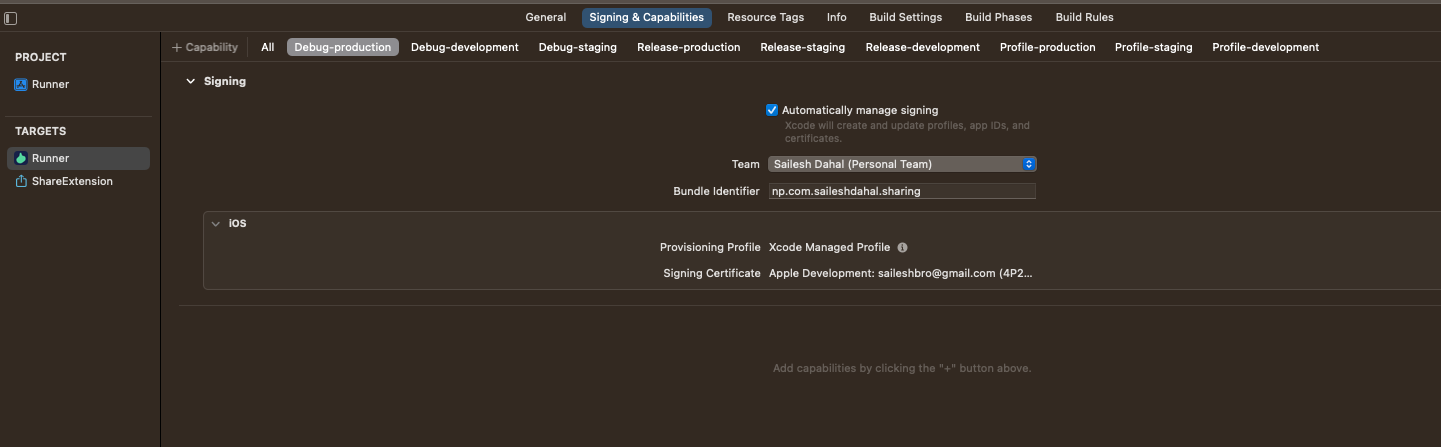
Once done, we need to assign both targets with a group identifier. For both Runner and ShareExtension target, go to Signing & Capabilities.
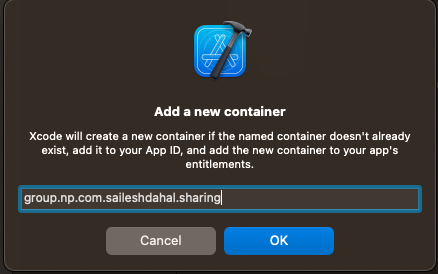
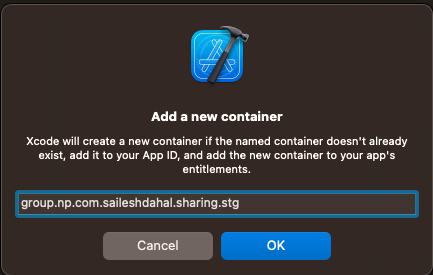
Now, for each flavor, we will add an app group.
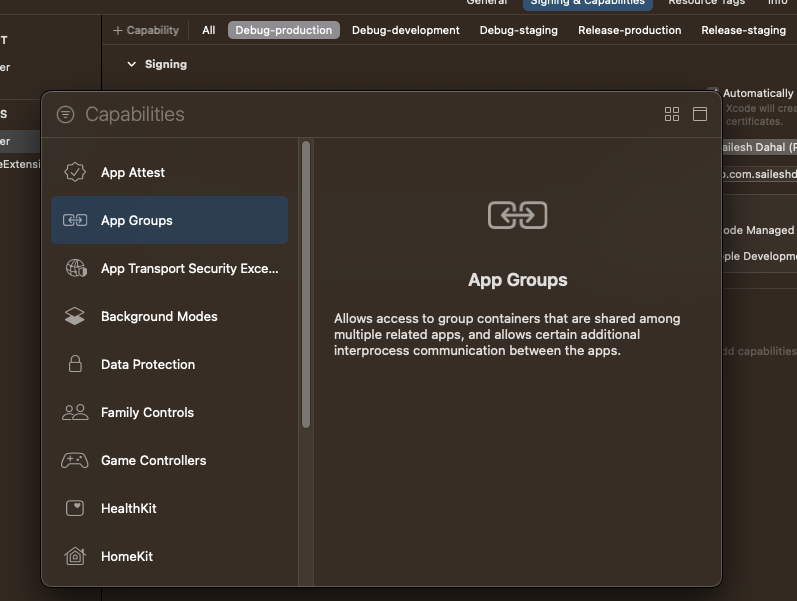
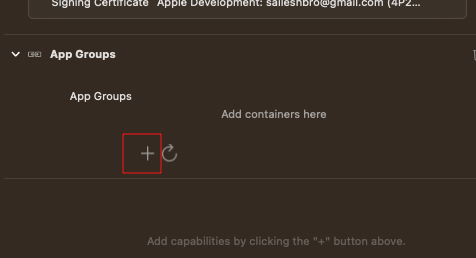
🚨 Note: Make sure to add the group id as
group.<bundle identifier>for each flavor.
For Debug-production, Release-production, and Profile-production.
💡 Tip: For matching group, you can select the check box
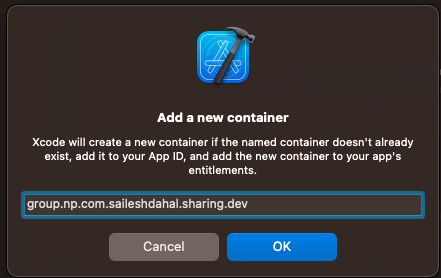
For Debug-development, Release-development, and Profile-development.
Similarly for Debug-staging, Release-staging, and Profile-staging
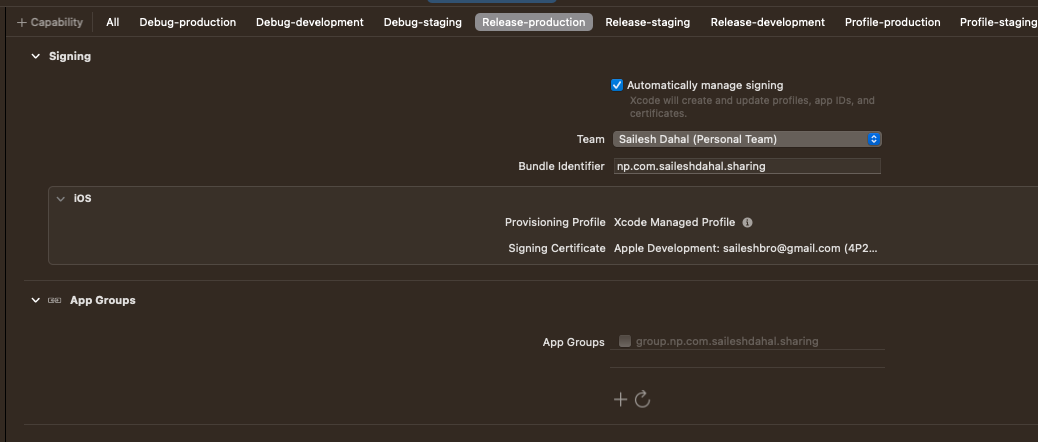
If you click on Target -> Runner -> Signing & Capabilities -> All, you should see the following.
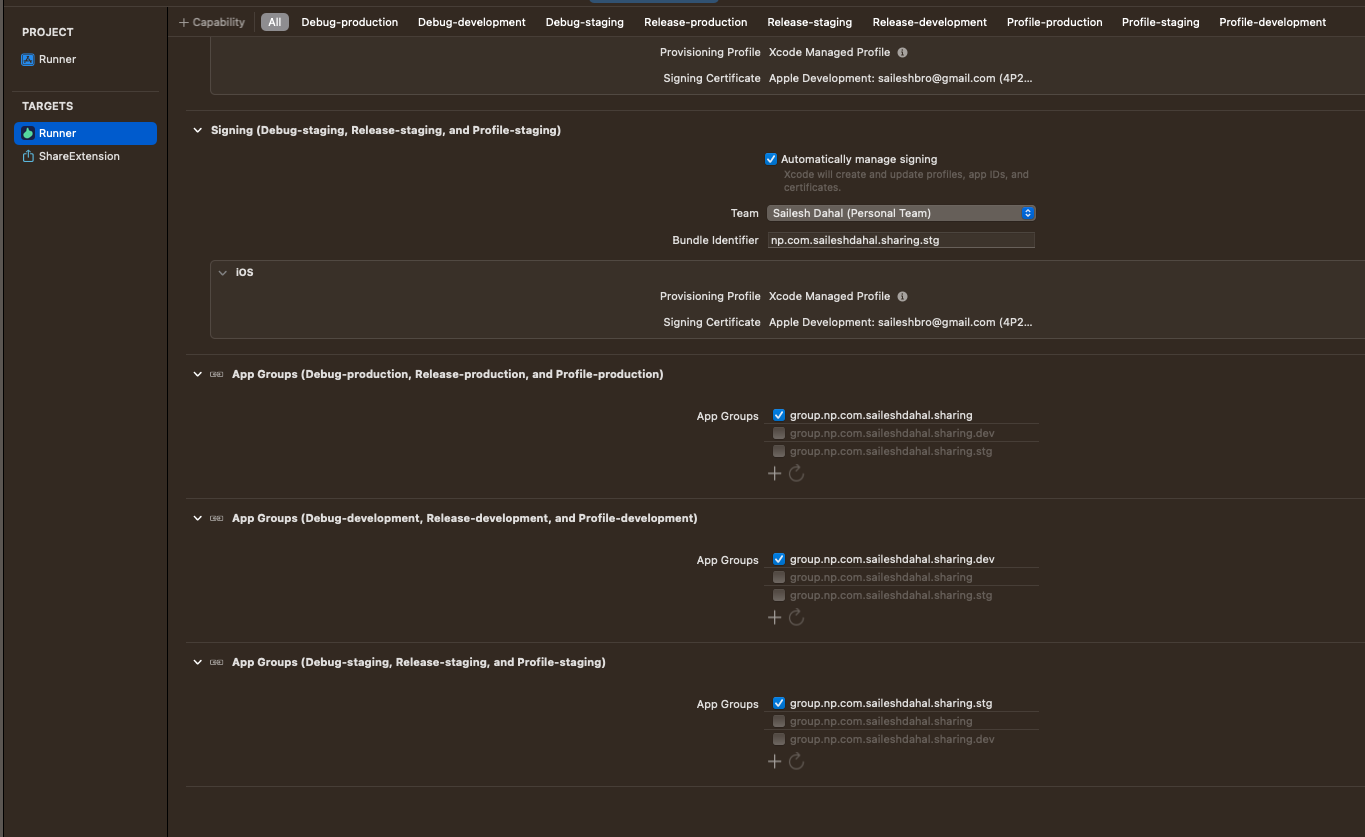
This will create entitlements files for each configuration.
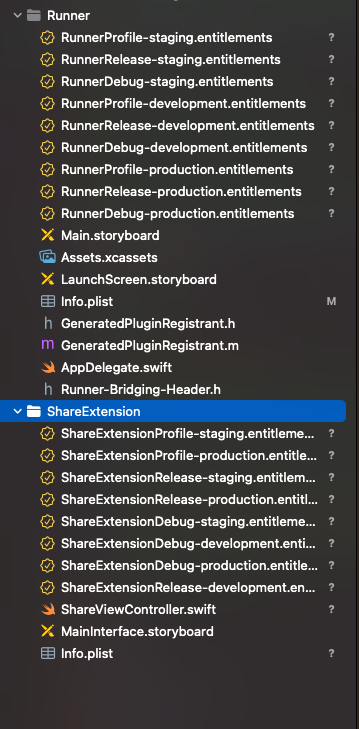
Similarly for ShareExtension we can quickly create .entitlements files. In ios/ShareExtension we will create an entitlements file for each config and each flavor. We will create 9 entitlements files for each flavor (production, development, and staging), and Debug, Release, and Profile config.
For Debug, Release, and Profile configuration for development flavor, we will create three files ShareExtensionRelease-development.entitlements, ShareExtensionDebug-development.entitlements, and ShareExtensionProfile-development.entitlements, with the following contents.
<?xml version="1.0" encoding="UTF-8"?>
<!DOCTYPE plist PUBLIC "-//Apple//DTD PLIST 1.0//EN" "http://www.apple.com/DTDs/PropertyList-1.0.dtd">
<plist version="1.0">
<dict>
    <key>com.apple.security.application-groups</key>
    <array>
        <string>group.np.com.saileshdahal.sharing.dev</string>
    </array>
</dict>
</plist>
Similarly, for each configuration of production and staging flavor, we will create three entitlements files.
By the end, we will have the following files
ShareExtensionDebug-development.entitlements
ShareExtensionDebug-production.entitlements
ShareExtensionDebug-staging.entitlements
ShareExtensionProfile-development.entitlements
ShareExtensionProfile-production.entitlements
ShareExtensionProfile-staging.entitlements
ShareExtensionRelease-development.entitlements
ShareExtensionRelease-production.entitlements
ShareExtensionRelease-staging.entitlements
Once this is done, link the entitlement files by clicking + button for app group capabilities for each flavor.
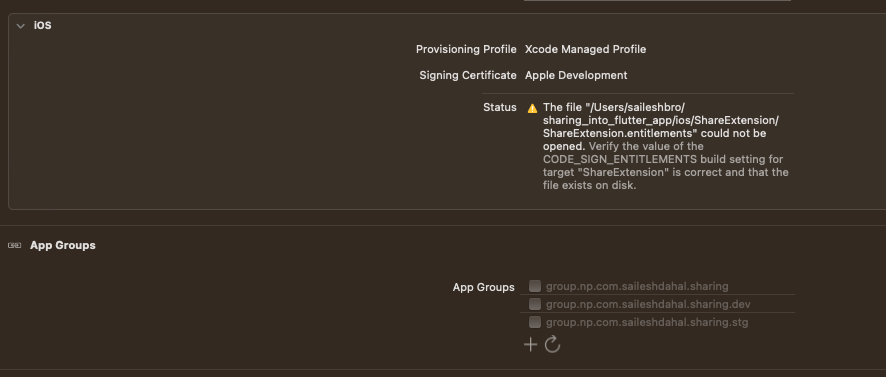
💡Tip: Make sure the entitlements files are correctly linked, else this may not work properly for each flavor.
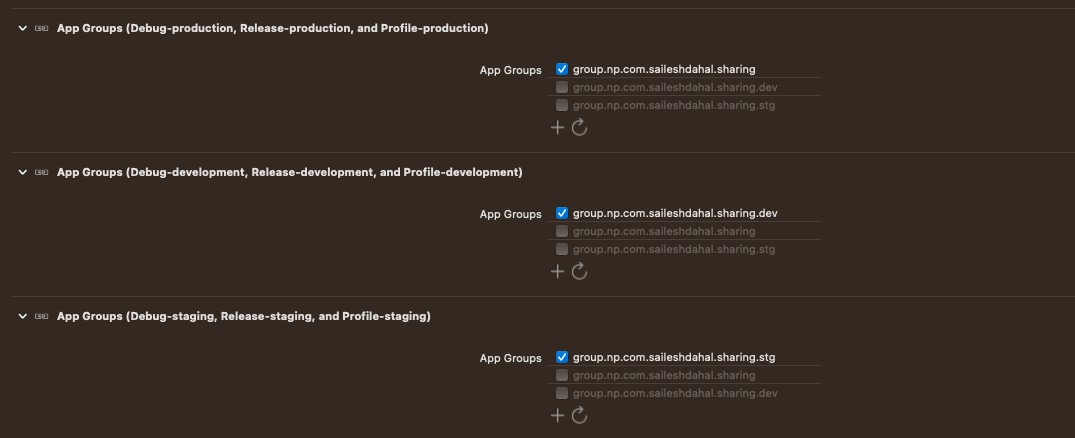
Make sure, we have all the entitlements files linked up correctly. If we do everything right we will see the following.
🚨 For iOS setup without flavors
All the setup above can be taken reference for the apps without flavors as well. The only difference here is, we can have single entitlements file for each target, that is Runner.entitlements and ShareExtension.entitlements.
The bundle id for the Share Extension will be np.com.saileshdahal.sharing.ShareExtension, and the group bundle id will be group.np.com.saileshdahal.sharing
Now, for the final setup, we will make some changes in Podfile and register the dependency.
target 'Runner' do
  use_frameworks!
  use_modular_headers!

  flutter_install_all_ios_pods File.dirname(File.realpath(__FILE__))

  # Add this block
  target 'ShareExtension' do
    inherit! :search_paths
    pod "share_handler_ios_models", :path => ".symlinks/plugins/share_handler_ios/ios/Models"
  end
  # End of block

end
Once this is done, run pod install --repo-update in ios directory.
🚨Note that
pod install --repo-updategives an error: [!] No podspec found forshare_handler_ios_modelsin.symlinks/plugins/share_handler_ios/ios/Modelsuntil the project has been built at least once, at which point Flutter has created the referenced symlink.
🥳 Thanks Guyren Howe for mentioning this in the comments.
🧪 Testing time
Let's check if we can see our app when we share something.
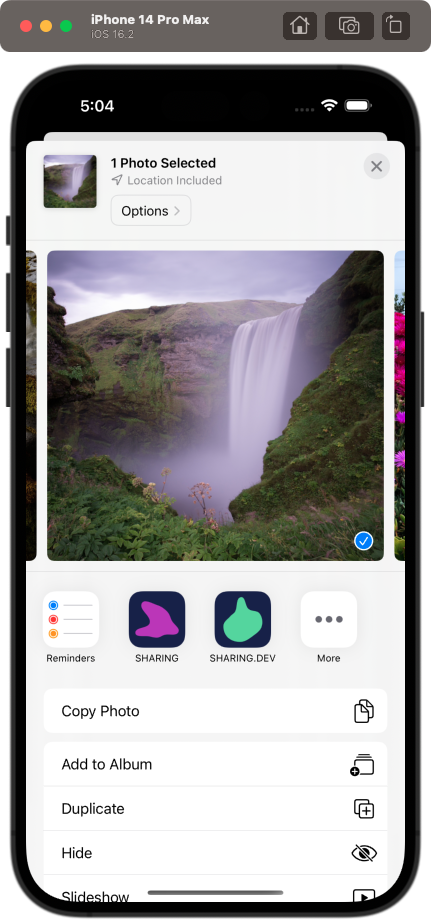
Here, we can see both flavors appear while we try to share images from photos.
Getting shared media in Flutter
Now that we have both Android and iOS working, we can start implementing our share handler service to get the shared media.
The package exposes a stream of SharedMedia. We can subscribe to this stream and do side effects based on the shared media type.
Also, the package has a method to get the initial shared media. This will be helpful if the app is in terminated state, and we open the app from the share page.
I have added the code snippet from share_handler
class HomePage extends StatefulWidget {
  const HomePage({super.key});

  @override
  State<HomePage> createState() => _HomePageState();
}

class _HomePageState extends State<HomePage> {
  StreamSubscription<SharedMedia>? _streamSubscription;
  SharedMedia? media;

  @override
  void initState() {
    super.initState();
    initPlatformState();
  }

  @override
  void dispose() {
    _streamSubscription?.cancel();
    super.dispose();
  }

  Future<void> initPlatformState() async {
    final handler = ShareHandlerPlatform.instance;
    media = await handler.getInitialSharedMedia();
    _streamSubscription = handler.sharedMediaStream.listen((SharedMedia media) {
      if (!mounted) return;
      setState(() => this.media = media);
    });
  }

  @override
  Widget build(BuildContext context) {
    return Scaffold(
      appBar: AppBar(
        title: const Text('Share Handler'),
      ),
      body: ListView(
        padding: const EdgeInsets.all(16),
        children: <Widget>[
          Text(
            'Shared to conversation identifier: ${media?.conversationIdentifier}',
          ),
          const SizedBox(height: 10),
          Text('Shared text: ${media?.content}'),
          const SizedBox(height: 10),
          Text('Shared files: ${media?.attachments?.length}'),
          ...(media?.attachments ?? []).map((attachment) {
            final path = attachment?.path;
            if (path != null &&
                attachment?.type == SharedAttachmentType.image) {
              return Column(
                children: [
                  ElevatedButton(
                    onPressed: () {
                      ShareHandlerPlatform.instance.recordSentMessage(
                        conversationIdentifier:
                            'custom-conversation-identifier',
                        conversationName: 'John Doe',
                        conversationImageFilePath: path,
                        serviceName: 'custom-service-name',
                      );
                    },
                    child: const Text('Record message'),
                  ),
                  const SizedBox(height: 10),
                  Image.file(File(path)),
                ],
              );
            }
            return Text(
              '${attachment?.type} Attachment: ${attachment?.path}',
            );
          }),
        ],
      ),
    );
  }
}
Now, if we run this code and try to share an image from Photos, we should see something like this 🥳.
🎉 Congratulations, we've reached the end of this article on how to easily share content from external apps to your Flutter app using the share_handler package! 🚀 Hopefully, you found this tutorial helpful and have learned a lot about effortless sharing in Flutter.
As always, the source code for this tutorial can be found on the GitHub repository at saileshbro/sharing_into_flutter_app. If you found this article useful, don't forget to leave a ⭐️ and share it with others.
And if you're interested in learning more about setting up flavors in Flutter, be sure to check out 🍰 Simplifying flavor setup in the existing Flutter app: A comprehensive guide to learn how to add different flavors to your app with unique configurations and build targets.
Thank you for joining me on this journey, and happy coding! 💻👨💻